


Midnight Drive(Throwback Thursday Blogs)
- Feb 2, 2017
- 3 min read
So, being a photography student at Red River College, we get some interesting assignments to work on. One assignment we had to work on that was due in January near the middle of the month, we had to take a photo of a car that we lit up ourselves. My group decided that we would attempt to light p a toy car in the studio thinking it would be easier than lighting a real car. We were very wrong to think this.
Doing this assignment, we came across many different obstacles. You may not think it is that big of a deal, but in reality, it was very stressful at times for us. My two partners, Maddy and Melinda, worked on this with me for a good week. We had a few different plans for the car along the way that did go that well. Originally, we planned to build a puzzle and use that as our background for the car so that it would have a nice textured background. That was too much of a struggle and our time was crunched way more than we expected so we ended up scrapping that idea. We then tried to do light painting on the car with a phone flashlight. The car turned out okay until I tried to stitch the photos together in post production. I realized the tripod holding the camera in place was moved slightly while we were taking the photos so I couldn’t stitch the photos together properly afterwards. That was probably for the best though due to the lighting turning the red car orange.
We finally gave up on the cool ideas and just decided to light the car with studio lighting.
Diagram behind scenes behind the scenes behind scenes
Looking at the photos afterwards, they were really nice, but there was something a little bland about it. The background was just plain black and the bottom was also black. So it was up to me to do some editing on the background.

Just looking for a good background for this photo was a struggle for me. Either they were fuzzy, they were not a good fit for the car, or for the road, it was not going the same way that the car was facing. This was a real pain to try an do and I got frustrated a lot. I was ready to give up but I knew that I could do this if I tried hard enough. Since I started going to school for photography, I have learned a lot more about editing photos and such. I spent a good three or so hours editing this photo to get it just right for this assignment that was due the next day. I added a background to the photo, a road on the bottom of the car, contrast to the image, I brought up the highlights in the front and back of the car and I had to edit out the dust that was in the front window of the car. The three-hour editing project plus about four days of getting the proper lighting for the car and about a week of dealing with failed ideas, our final image turned out pretty amazing I would have to say.
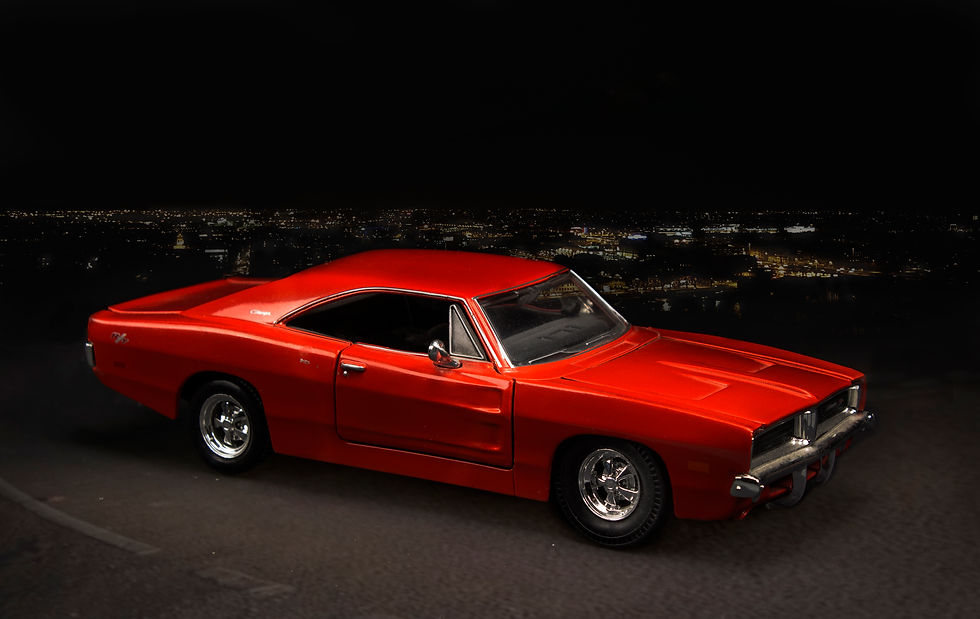
Showing people the photo after all the editing was done, they had assumed it was a real car, which actually made me really proud about this. The way I edited the lighting as well makes the car look as though it was under a street lamp. I was really proud of all the work we put into this photo, and it was a huge accomplishment in my books.
I definitely wouldn’t mind doing some more edits of this kind of photography, it was a huge stress relief to just focus on the photo instead of everything else around me. My progress with editing photos since before I started this course until now is absolutely amazing and I cant believe how far I actually have come. I have come a long way and I am only going to get better as the years go on. I think I will end up doing some tabletop/ commercial work on the side because I love putting all my focus on the tiny details in an image, which is the main focus in these types of photography. Let me know what you think of this edit that I did and give me your thoughts on something I can fix with it. i will blog about more shoots that I do in the future.
Comments